Example: Tracking chores
This example is used to demonstrate adding a new Value Type and a new Data Mine Type which uses the List of strings data type. List of strings has a number of features for managing and most of these features are demonstrated in this example.
See the documentation for Managing your Data Mine for the specifics on how to create a new Data Mine Type and Value Type.
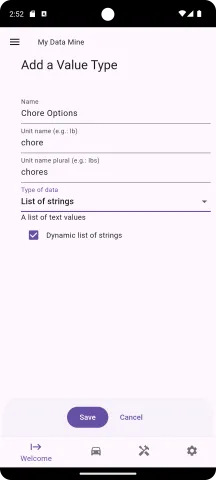
From the "Welcome" screen, go to "Data Mine Admin" and then select "Data Mine Value Types" from the "Manage your Data Mine" screen. This will bring you to the screen to manage your Value Types. Press the "+" button to add a new value.
Here we fill in the values:
- Name: Chore Options
- Unite name: chore
- Unit name plural: chores
- Type of data: List of strings
- Check the box for "Dynamic list of strings"
Checking the box for "Dynamic list of strings" means that you can add new tags (or chore options in this case) when you add new entries. If you leave this box unchecked, then you have to pre-populate the list by selecting the "Value List Options" menu option on the "Manage your Data Mine" screen, and then selecting the Value Type (e.g. Chore Options) and then add new options in this screen.
When collecting data and "Dynamic list of strings" is unchecked, you will be limited to entering what is in the list of options.
For our example, press "Save" to create the "Chore Options" Value Type.
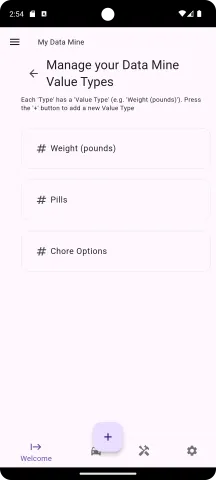
This will result in the new Value Type being created and listed on the "Manage your Data Mine Value Types" screen.
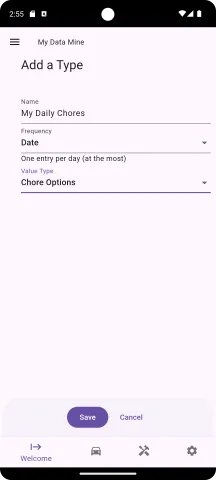
From the "Manage your Data Mine" screen, select the "Data Mine Type" menu option. On the "Manage your Data Mine Types" screen, press the "+" button to add a new Data Mine Type. Fill in the new type with the following values:
- Name: My Daily Chores
- Frequency: Date
- Value Type: Chore Options
The Value Type used is the recently created List of strings option.
Press "Save" to add the Data Mine Type.
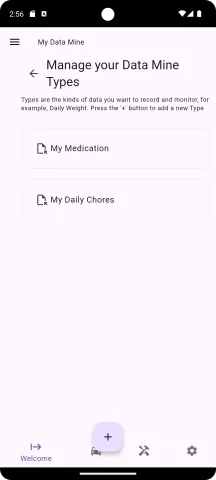
Going back to the "Manage your Data Mine Types" you can see the new "My Daily Chores" type added.
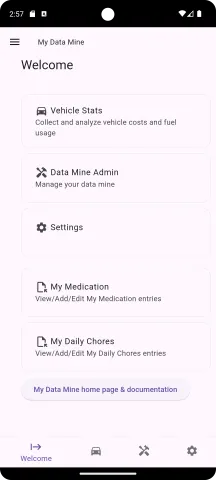
Pressing the button to go back to the Welcome screen, you can see that "My Daily Chores" is now on the main screen so that data collection can be done. Select the "My Daily Chores" option to go to the "Entries" screen for "My Daily Chores"
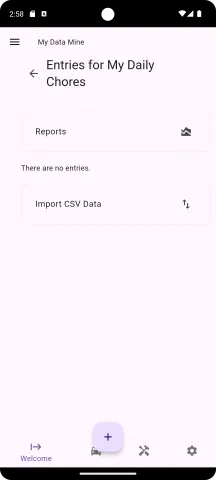
Initially there are no entries. On the "Entries for My Daily Chores" screen, you have the following options:
- View reports
- Search for entries
- Select an entry for editing
- Import CSV Data
- Add a new entry
Press the "+" button near the bottom of the screen to add a new entry
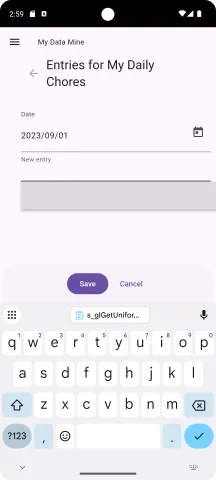
In our case, Chores are dynamic options, and since we didn't pre-populate our list of options, we will need to add new options as we go. The drop down list will show a blank list of options initially, but as you add new entries, this list will be populated with values used in previous entries.
Enter a date (e.g., the current date).
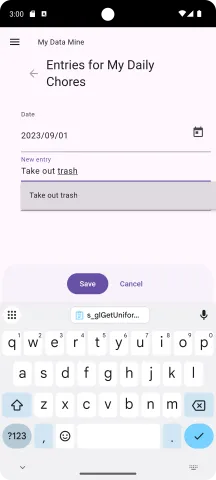
Fill in "Take out trash" as the first chore option.
As soon as a new entry has text, a new empty entry box will appear beneath it for the next value. Keep typing to finish the first entry.
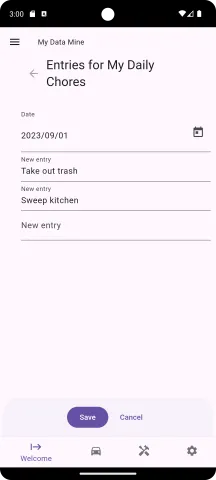
Then add a second entry: "Sweep kitchen". Notice how a third blank line appears for the next option. For this first entry there will only be two values.
Press "Save" to create our first "My Daily Chores" entry.
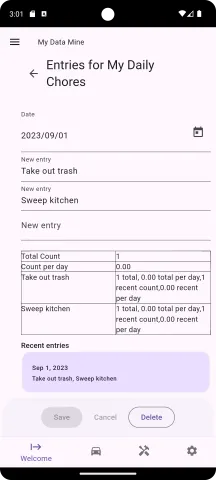
The edit screen for the first entry shows the same form as when we created the entry with the two Chore Options entered. Beneath the entry is a small table that gives basic stats for "My Daily Chores" including:
- The total count of "My Daily Chores" entries
- The number of entries per day (the number of days is counting from the very first entry to the current date)
- Then there is a break down of each option's usage historically
This table is followed by a listing of entries that are close to the selected entry (for example, 5 before and 5 after).
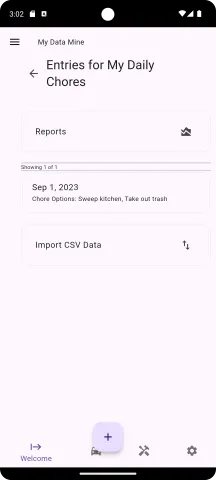
The "Entries for My Daily Chores" will show the new entry. The search filter does not show up until enough entries are entered to make searching useful.
Press "+" to begin adding another entry
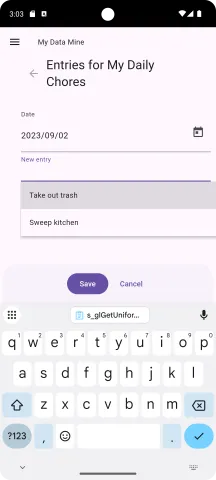
Make sure to select a different date.
Notice how the chores options now has the existing values that were created using the first entry.
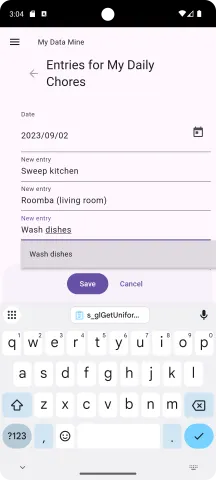
For the second entry, reuse the "Sweep kitchen" value and "Wash dishes" and add a new value "Roomba (living room)".
Then press "Save".
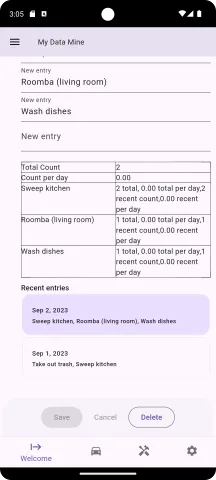
The edit screen for the second entry, like the first, shows the stats below the form for editing the value. The table and recent entries are updated and show the first entry.
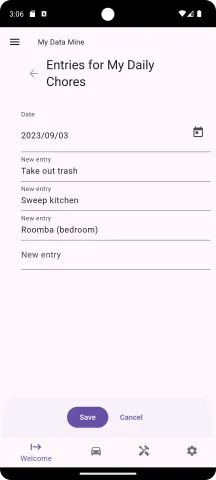
Follow the same steps again and add a third entry with "Take out trash", "Sweep kitchen" and "Roomba (bedroom)".
Don't save the entry yet.
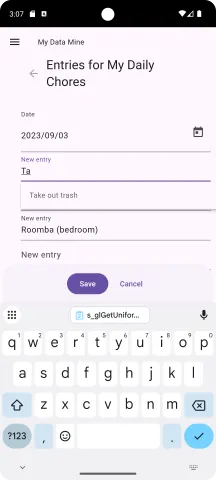
To remove an option from an entry, place the cursor at the end of the line to be deleted, in this example, the "Take out trash" option will be removed.
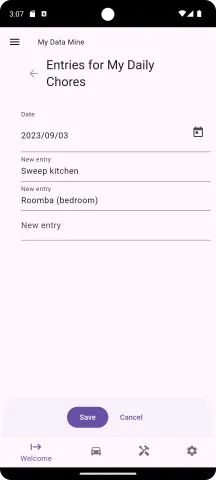
As soon as the line becomes blank (press the delete button all the way to until the string is blank), then the option list is updated and all entries are moved up to remove the deleted entry.
Press "Save" to add the new entry.
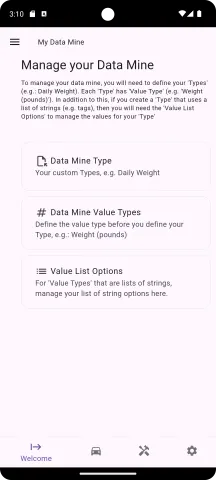
Go to the "Value List Options" screen. From the Welcome screen, go to "Data Mine Admin" and then select "Value List Options".
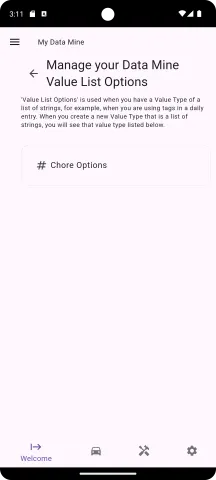
"Chore Options" will show up as a Value Type of List of strings.
Select "Chore Options"
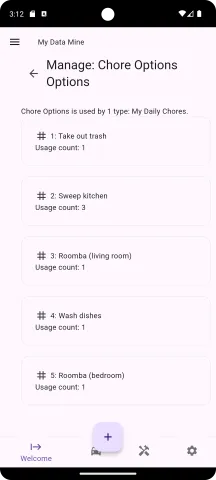
The "Manage: Chore Options Options" screen displays a list of all the current chore options. When the screen loads, it will go through all the existing entries and make sure that every chore option is represented in this listing. If entries were imported using the CSV Import feature, they should be added when this screen is opened.
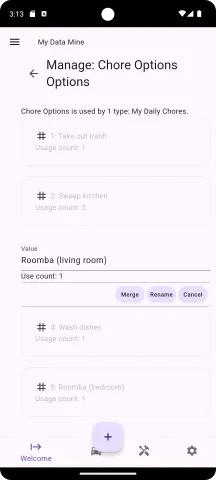
To edit an option, select it from the list. Selecting an option to edit will cause the remain options to be grayed out. An option cannot be edited if there is already data collected that uses its value. For any option with existing data, you can:
- Merge
- Rename
For any option with no existing data that uses it, you can:
- Edit it
- Delete
When editing an entry, you cannot rename it to match an existing option. Note: Option names are case sensitive so "Sweeping" and "sweeping" are considered different.
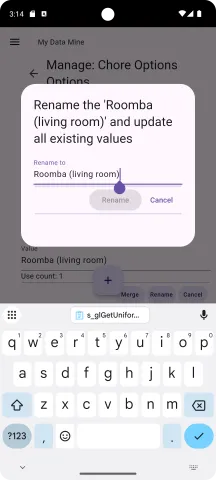
Select the "Rename" option to rename "Roomba (living room)".
This will open a dialog box where a new name can be entered.
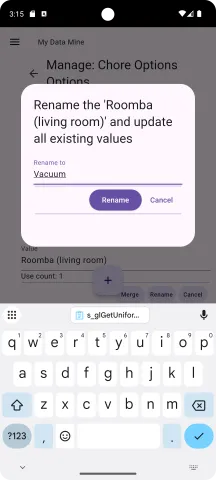
In this example, "Roomba (living room)" will be renamed to "Vacuum".
Once the new name is entered, press the "Rename" button.
Note 1: that if the name already exists, then the "Rename" button will be disabled.
Note 2: after pressing the "Rename" button, the app will do a search and replace for existing options and rename all entries that use the option to use the new name.
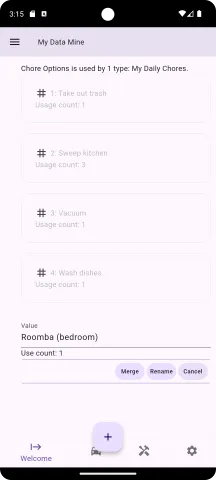
No select the "Roomba (bedroom)" option and this option will be merged with the newly renamed "Vacuum" option. Press the "Merge" button.
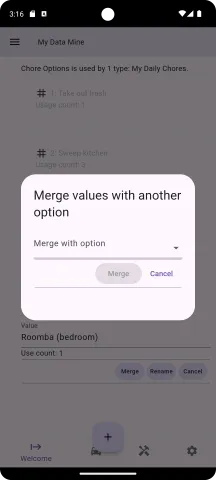
A dialog screen is provided. Merge is similar to Rename in that it renames existing entries to use the merged value, but it is different in that it will delete the old option from the list of available options.
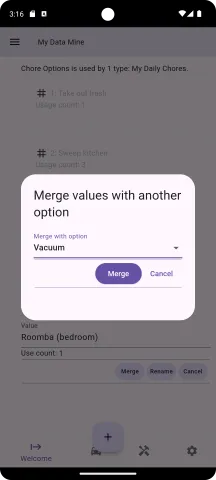
Select "Vacuum" from the list of options and press "Merge"
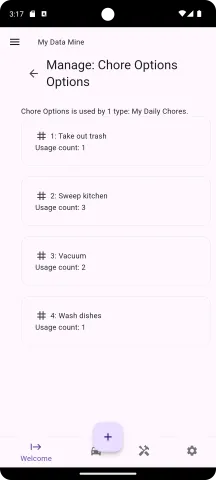
The list of available options is updated. Notice that the count for Vacuum is 2 to reflect that the two different Roomba options have been renamed.
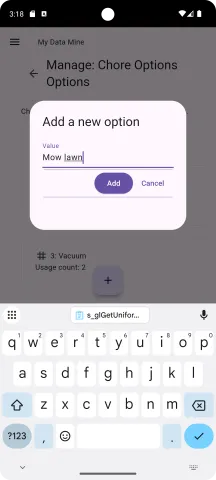
Press the "+" button to add a new option. This opens a dialog box where the new option name can be entered. Press "Add" to add it to the list of options.
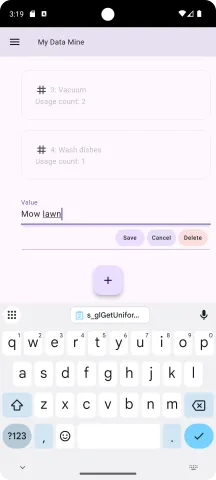
New entries that have "0" usage, can be edited in place and they can be deleted.
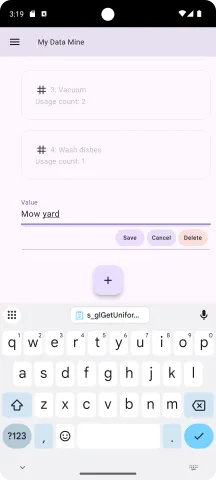
Trivial changes can be made (changing lawn to yard). Press "Save" to commit the changes.
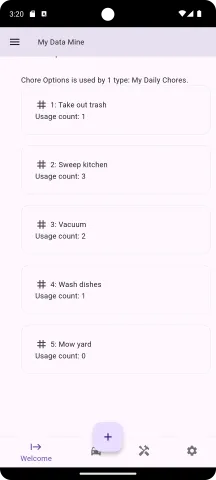
Mow yard is a new option with a usage count of "0". Press "Delete" to remove this new option.
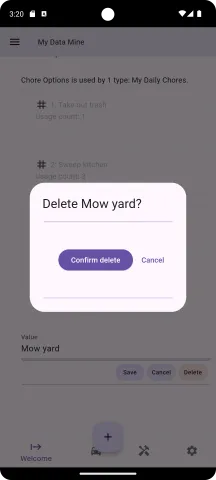
A confirmation dialog is presented to confirm deleting an option. Press "Confirm delete" to delete the option.
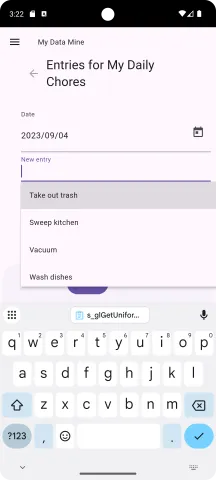
Adding a fourth entry, the list of options available now reflects the changes recently made.